Everything You Need to Take Stunning Solo Travel Photos
Photos are the one thing every traveler collects. Unlike shot glasses or key chains, they make for highly personal souvenirs, capturing a meaningful moment in a tangible way—whether that’s a gorgeous view, a glimpse of local culture, or just a good time with friends.
Traveling in a group or with a partner means you’ve got a built-in trip photographer at your side from start to finish, willing to snap as many photos of you as you’d like. But what do you do when you’re traveling alone? Selfies are great and all, but it’s safe to say no one wants a vacation album made up exclusively of their own face.
Luckily, snapping those IG-worthy candids by yourself isn’t as tricky as you’d think. With the right gear and a little know-how, you’ll come home with fantastic memories of your solo trip and the stunning photos to match.
Solo travel photography gear
First, a disclaimer: you definitely do NOT need to rush out and drop a ton of cash on photography gear in order to take great solo travel pics! Plenty of travelers manage just fine with nothing more than their smartphone and a little trial and error.
That being said, if you’re looking to take your solo travel photography to the next level or don’t love the thought of leaving your phone balanced on a ledge while you hurry to strike a pose, read on for our gear recommendations! 👇

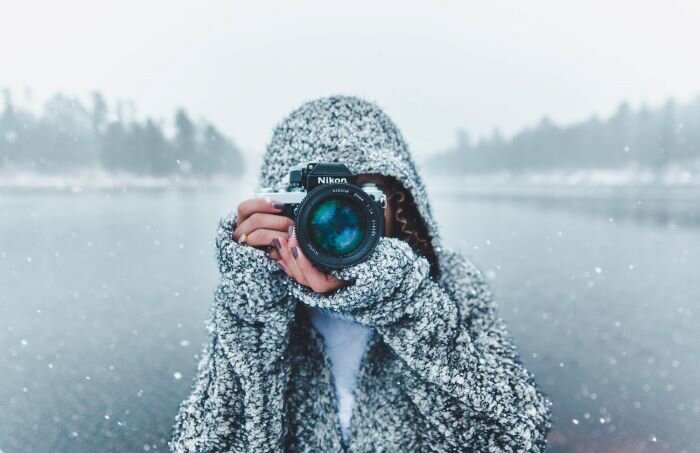
📸 CAMERAS
You’ve probably already got a decent camera built into your phone, but a proper mirrorless or DSLR camera can go a long way to making your photos look their absolute best. If you’re intimidated by the cost or the learning curve involved with high-end camera gear, don’t worry! There are quality travel cams available for every budget and level of experience. Here are 3 of our faves:
Canon’s smallest and most affordable mirrorless model is perfect for anyone looking to dip their toes into the waters of travel photography without dropping a ton of cash.
The EOS M100 is light and sleek-looking with a large, selfie-friendly flip touchscreen that will appeal to smartphone photographers. Weighing less than 10 ounces, the body of the camera can easily fit in the palm of your hand and won’t slow you down when carrying it around. On-body controls are kept to a minimum and most of the functions are accessed through the touchscreen—this simple interface plus the camera’s excellent full auto mode make the EOS M100 easy to use right out of the box.
Like pricier DSLR models, mirrorless cameras typically feature an interchangeable lens system. The EOS M100 comes equipped with a multipurpose 15-45mm lens that does a solid job handling day-to-day shots. Photographers looking to up their game a bit can look into some of the other EOS M lenses Canon offers: a compact telezoom lens, ultra-wide zoom lens, wide aperture prime lens (the one you want for blurred backgrounds and tricky light situations), and a macro lens for close-up shots.
With plenty of thoughtful touches—like a pop-up flash, Wi-Fi, NFC, and Bluetooth support, and Dual Pixel autofocus—the EOS M100 is fast, intuitive, unintimidating, and flat-out fun to use.
DSLRs can be notoriously bulky, which makes them a pain to pack and haul around. The D5600, by contrast, is almost as easy to tote around as its mirrorless cousins, which is a big deal if you’re the kind of traveler who covers a lot of ground when you’re abroad.
Despite its smaller size, the D5600 boasts a crisp 3.2” touchscreen and a deep, comfortable grip. Its button and dial interface is simple enough for beginners to figure out while still offering experienced photographers enough control when shooting. One of the best sensors on the market guarantees that the D5600’s out-of-camera JPEGS look incredible, and its impressive autofocus system makes snapping beautiful pictures as simple as tapping the touchscreen and clicking the shutter. Plus, the wide variety of excellent, affordable Nikon prime lenses means you can take your travel pics from wow to WHOA just like that.
The icing on the cake is Nikon’s SnapBridge tech—a system that uses Bluetooth and Wi-Fi to keep the D5600 connected to your smart device and transfer any photos you take from one to the other seamlessly and continuously. With so much going for it, it’s no wonder this fantastic, travel-friendly DSLR tops so many photographers’ wish lists.
GOOD TO KNOW: The acronym DSLR stands for “digital single lens reflex.” This refers to the mirror inside the body of the camera that reflects light coming through the lens up through a prism and out the viewfinder (where we see the image). The mirror quickly flips up when you click the shutter, allowing light to hit the sensor and capture the picture. The advantage of DSLRs is that when you look through the viewfinder, what you see is what you get—the image you capture will look exactly like the image you’re seeing in real time.
We love the flexibility and sleek look of this best-in-class travel camera, which can flip from high-res stills to luscious 4K video in an instant.
Lightweight, versatile, and loaded with features, the Lumix ZS200 is small enough to fit in a purse without sacrificing functionality. Its physical controls and responsive LCD touchscreen make tweaking images on the go a cinch without the need for a deep dive into any digital menus. The pop-up flash allows you to adjust the light output as well as choose from several different flash modes, such as slow sync, and the sharp electronic viewfinder comes in handy when sunlight washes out the touchscreen display.
The ZS200 comes equipped with some extremely useful settings, including raw capture, 15x optical zoom, and a 4k PHOTO mode that allows users to extract single still images from a 4k burst file (super handy if you’re a person who feels like you need to snap a hundred pics of yourself before you finally get one you like). Bonus: Panasonic’s nifty wireless app, initiated with a quick tap of the Wi-Fi button on the display, allows you to control the camera remotely using your smartphone as well as transfer images between the two devices.
This ZS200 is definitely not the cheapest option around, but there’s no question this is one of the best travel cameras on the market right now.
REMEMBER: When it comes down to it, the “best” camera isn’t the one with the most attractive specs, or the biggest price tag, or the 5-star reviews. The best camera is, honestly, the one that you’ll actually use. Do you love the look and feel of the camera? Is it easy and comfortable for you to carry it around? Do you feel confident with the controls? Do the pictures turn out the way you like? If so, then that’s the one for you (even if it’s just your phone)!

🕹️ ACCESSORIES
Now that you’ve got your camera sorted, it’s time for the frosting on the proverbial solo travel photography cake (that’s a thing, right?): accessories!
These little gadgets are what allow you to capture those casual “oh, is someone taking a photo of me right now?” pics that are the hallmark of the best solo traveler photographers. Let’s start with a classic...
No, this is not a joke (although we admit there is something inherently funny about seeing a person hamming it up for their phone-on-a-stick 😂).
Despite all the memes and hilarious stories about people falling into pools while using them, selfie sticks are actually one of the most useful tools in a solo traveler’s kit. Not only are they handy for snapping proper selfies without cutting part of your head out of the frame (thanks for nothing, short arms!), but they allow you to get pretty creative with your shots—hold your selfie stick out in front of you while you walk for a fun vlog-style video, balance it backward across your shoulder for a moody over-the-shoulder snap, or hold it straight out to the side to capture your profile gazing dreamily into the distance. You can even lean your selfie stick against a wall, fence, or tree to use as a makeshift monopod in a pinch!
Best of all, selfie sticks are dirt cheap. This one has four stars and over 6,000 reviews on Amazon, and it’s only $9.99! True bang for your buck.
Although we just mentioned using your selfie stick as monopod, that’s really more of a “desperate times call for desperate measures” thing. A tripod is a must for solo travelers serious about capturing stellar pics.
Don’t worry, we’re not expecting you to cart around one of those massive, heavy-duty tripods that require their own suitcase (although you’re more than welcome to do so, if you’d like!). Our favorite travel tripods are small, light, and easily stuffed into a carry-on. The JOBY GorillaPod is an excellent option, with wrappable legs and rubberized foot grips that allow you to set it up virtually anywhere—on flat ground, hanging from a tree branch, or wrapped around a signpost. This particular model can support cameras weighing up to 6.6 pounds and comes with a bonus smartphone adaptor that allows you to use it as phone tripod too.
A tripod allows you to capture all sorts of pictures you wouldn’t be able to take easily with a camera or even a selfie stick alone. Snap wistful photos of yourself walking away, toss leaves into the air, sit on the edge of a canyon, or pose in an interesting doorframe—the options are endless!
Which brings us to our final accessory…
Remote shutter
The perfect companion for your tripod, a remote shutter release lets you control your camera (or smartphone) from a distance. No more setting timers and running into position—you can take your time composing the exact shot you want and snap away whenever you’re ready with the touch of a button!
Some cameras, particularly newer ones, are capable of connecting to your phone via an app, in which case you probably don’t need a separate remote shutter. But if your camera’s a bit older or if you prefer to occasionally leave your phone in your hotel room when you go out, it’s a nifty little device to have on hand.
(FYI: remote shutters are not universal, so double-check when you buy one to make sure it’s compatible with your camera or smartphone!)

Solo travel photography tips
Alright, you’ve got the gear—what next? These solo travel photography tips will help you put it to good use:
🤷 Develop a thick skin: Odds are, people are going to stare at you while you pose by yourself for pictures. Some folks are just curious, while others can be straight up judgey about it—make a conscious decision to ignore the attention and just do your thing. (When are you ever gonna see these people again anyway?)
🤝 Don’t be afraid to ask for help (but be smart about it): If you’re having trouble getting the shot you want on your own, ask another tourist nicely if they can lend a hand. Make sure you’ve got your camera or phone settings properly configured before handing it over so that it’s easy for your new friend to snap the pic. And of course, use your best judgment when enlisting strangers for help—tourists also carrying cameras or traveling in a group are typically safe bets, but there’s always a chance your would-be assistant might run off with your gear!
🌅 Show up early: Taking solo travel photos is way easier when there’s nobody around, and the best way to make sure that happens is to arrive before everyone else does. Plan to wake up early and hit popular tourist spots before the crowds show up (or, alternately, you can try arriving right before closing time).
💃 Practice your poses ahead of time: Seriously! Practice posing in front of a mirror and get a feel for your best angles and your favorite smile. It’s much easier to nail that solo candid when you already have a specific look in mind and know how to arrange your body to achieve it.
✨ Polish things off with good editing: What you do with your photos after you take them is just as important as how you set them up! If you’re taking pics with your phone, use the Snapseed app to edit them. For photographers who prefer a camera, Lightroom and Photoshop are both powerful editing options that will allow you to really flex your creative photography muscles.


Courtnie is the founder & CEO of TravelBash. After years as an ambitious fundraiser, she took her passion for travel full-time. She has lived all over the U.S. and abroad and after planning her own destination wedding, she decided to help other couples plan their big day abroad too. She has written “Passport to Paradise: The Complete Destination Wedding Guide,” a top seller on Amazon. She has also been featured in Travel + Leisure, Destination I Do and The Washington Post. As a certified travel advisor, expert event planner and natural connector, she uses her powers to create VIP travel experiences.